Nothing travels better than our selection of mobility scooters. These sleek scooters navigate with ease, whether you’re inside a store or outside on the sidewalk. When it’s time to transport your scooter, the convenience continues.
The majority of our mobility scooters are equipped with feather-touch one-hand disassembly. You can easily transition from the full scooter to five manageable pieces. Below you’ll find step-by-step instructions on how to disassemble and reassemble your mobility scooter.
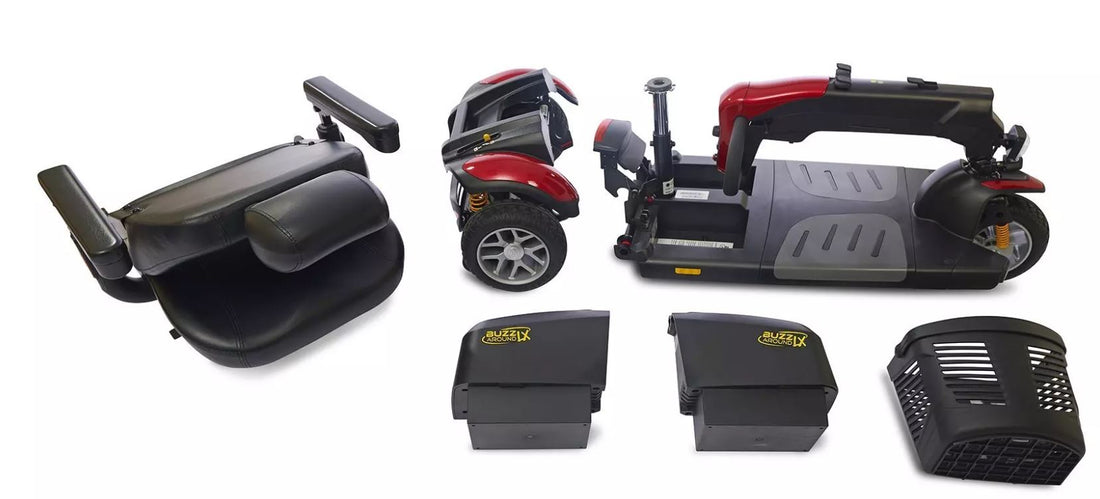
Disassemble your mobility scooter
When you are ready to disassemble your mobility scooter, make sure you have enough space to move around the device. It will break down into five stowable pieces.
These instructions are specifically for portable non-foldable scooters/power wheelchairs.
- Fold down the seat by pushing forward on the back. Then lift the seat from the bottom. It will come off the seat post. Set the seat aside.
- Remove the front basket by unclipping it from the tiller. Set the tiller basket aside.
- Remove the battery pack, which is located under the seat. Simply grab the handle and lift up to disconnect it. The battery unit has velcro on the bottom so there may be some extra tension during the first few uses. Set the battery aside.
- Turn the knob at the base of the tiller to loosen it. Fold the tiller to the deck. Once folded, retighten the knob to secure the tiller.
- Between the front wheels and in front of the tiller is a locking mechanism. Press and twist. This will keep the tiller straight during transport. The wheel must be straight to lock it in place.
- Locate the handle behind the seat post. Use one hand to lift. This will disconnect the rear wheel assembly from the deck, front wheels and tiller.
- Move pieces separately, using their handles. Stow in the trunk or wherever you’re storing your scooter.
Reassemble your mobility scooter
- Line up the rear wheel assembly with the front part of the unit. You will see a bar running between the tires on the smaller, rear wheel assembly. On the rear end of the front section, you’ll see two upside down U-shaped fasteners. Those clips will snap onto the bar with a click. As part of this step, you also lock in the auto-connecting front to rear cable. This will enable power and brakes on the whole scooter.
- Loosen the knob on the tiller and adjust to your desired driving height. Tighten the knob, making sure the teeth are aligned or you may get some unwanted movement.
- Push the wheel locking mechanism — located in front of the tiller — in and twist. This will allow you to steer your scooter.
- Place the battery pack on the base, directly in front of the seat post.
- Insert the seat into the seat post. Lift the seat back up.
- Slide the basket onto the front tiller mount. It will click into place.